What you
- Initial AmpliTube 5 setup — from install to your first sound
- The basics of amps, cabinets, and effects
- How to set mic positions with VIR™ cabinets
- How to use AmpliTube 5 in Logic Pro
- How to control it with a MIDI controller
AmpliTube 5 MAX v2 is currently on sale: ¥52,290 → ¥17,812 (65% off, through July 31). If you also want TONEX MAX and other plugins in one purchase, check out the Total Studio 5 MAX bundle as well.


What Is AmpliTube 5? The Big Picture First
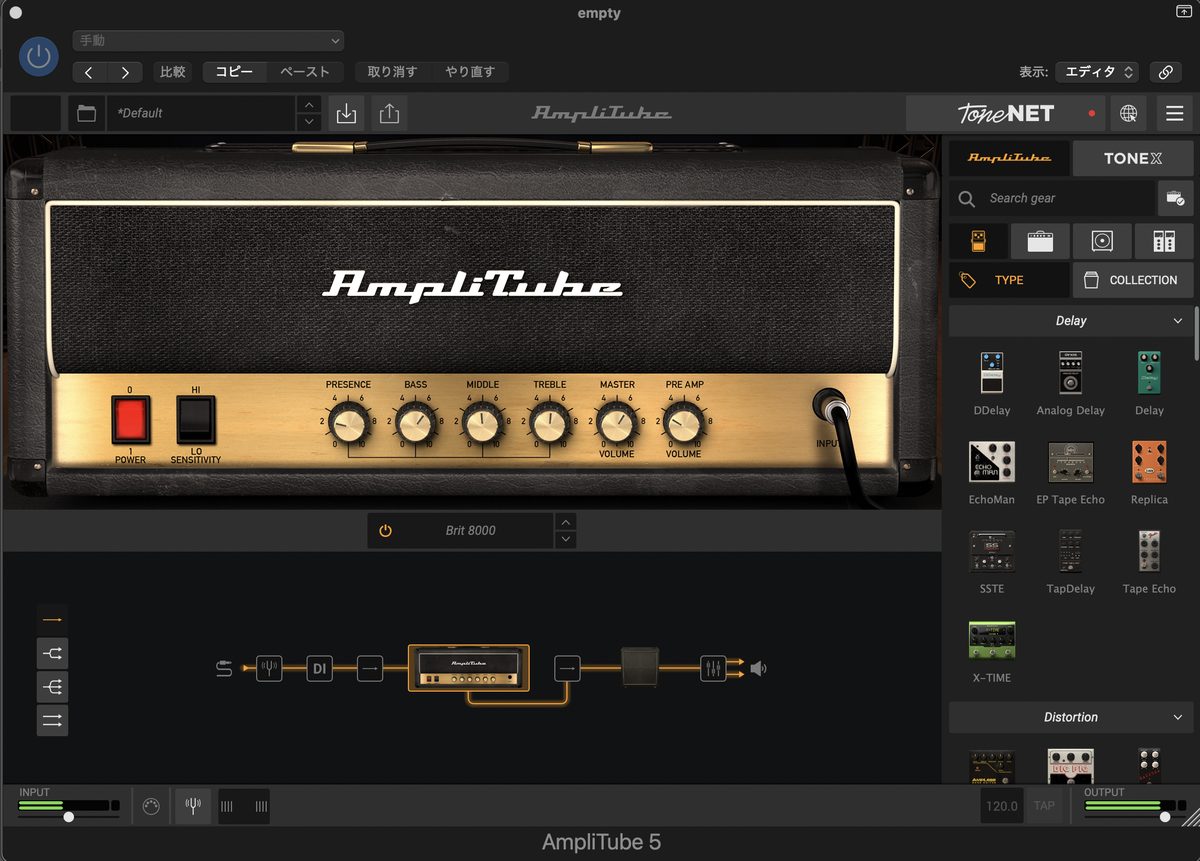
AmpliTube 5 is an amp simulator for guitar and bass, developed by IK Multimedia.
It runs as a standalone app, and also as a plugin inside DAWs like Logic Pro.
Here are the main features.
- Over 400 amp and effect models
- Realistic cabinet simulation powered by VIR™ (Volumetric Impulse Response)
- The same signal flow as a real rig: stomps → amp → cab → rack
- A studio mixer section for detailed mic placement and room settings
- DAW integration and MIDI support for recording and live use
Initial Setup: Getting Your First Sound
Step 1: Connect an Audio Interface
To use AmpliTube 5 properly, an audio interface is a must.
Plugging your guitar straight into the PC mic input won't work. Guitar signals need a Hi-Z (high-impedance) input.
No Hi-Z input = degraded tone
Plugging a guitar into a line-level input (-10dB or +4dB) makes the sound muddy or distorted. Always use a Hi-Z guitar input, or go through a DI box.
Step 2: Configure Audio/MIDI Setup
When you launch AmpliTube 5 standalone, start with the audio settings.
- Launch AmpliTube 5
- Open "Audio/MIDI Setup" from the menu
- Select your audio interface under "Audio Device"
- Set the "Buffer Size" (smaller = less latency, but more CPU load)
- Under "Input," select the channel your guitar is plugged into
Watch out for your laptop
If you unplug your interface mid-session, the input switches to the built-in mic and you'll get feedback. Be especially careful during live use.
Step 3: Check the Tuner for Signal
Once configured, check that the tuner at the top of the screen responds when you play.
Understanding the Signal Flow: How AmpliTube 5 Is Structured
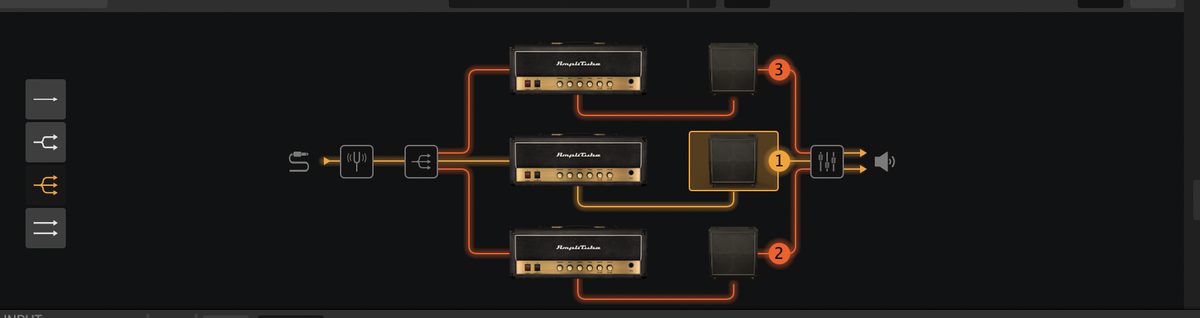
The AmpliTube 5 interface follows the same flow as a real guitar rig.
| Section | Role | Real-world equivalent |
|---|---|---|
| Tuner | Pitch check | Pedal tuner |
| Stomp | Drive, chorus, wah, etc. | Pedalboard |
| Amp | Amp head tone shaping | Guitar amp head |
| Cab | Speaker and mic simulation | Cabinet + mic recording |
| Rack | EQ, compression, reverb, etc. | Rack-mount gear |
| Studio | Final mix and master | Studio mixing console |
Choosing an Amp and Dialing It In
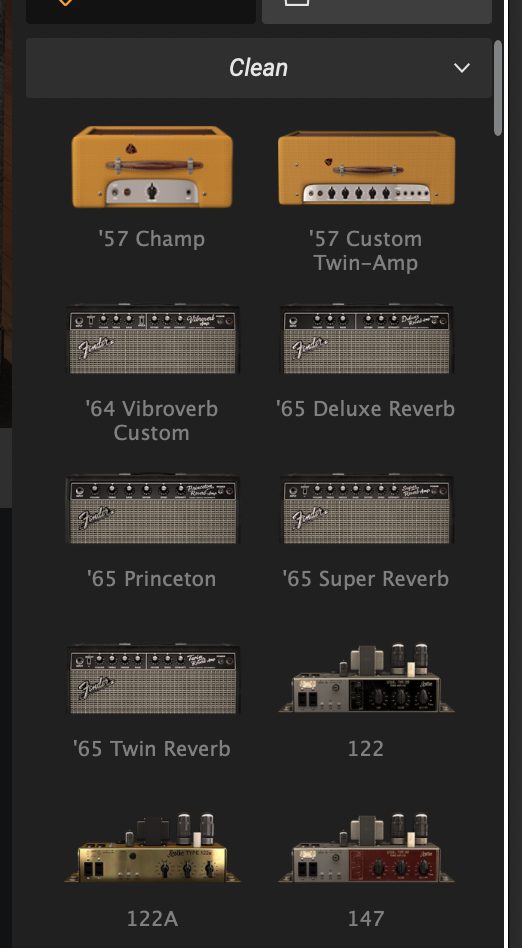
Pick an Amp Model
Click the model name in the Amp section to open the amp list.
Here's a quick reference by style.
| Tone character | Model examples (based on) | Best for |
|---|---|---|
| Clean to crunch | '57 Champ, '65 Twin Reverb, etc. | Funk rhythm, clean tones |
| British drive | British series (Marshall-style) | Rock, hard rock |
| High gain | VHandcraft 4 (Diezel-style), etc. | Metal, heavy rock |
| Alternative / shoegaze | SilverPlate 50 (PRS-style), etc. | Wall-of-sound tones that stay clear under drive |
Real Example: Building a Nirvana Guitar Tone in AmpliTube 5
You can watch the full amp-selection and tone-building process in this video.
This video recreates the guitar tone from Nirvana's "Come As You Are" in AmpliTube 5. You'll see the actual workflow, from amp selection to stomp combinations.
Adjust the Amp Controls
Once you've picked a model, work with these parameters.
- Gain: amount of drive. Higher = more distortion
- Bass / Mid / Treble: 3-band EQ
- Presence: top-end clarity and cut
- Volume: amp output level
How to Use VIR™ Cabinets: This Is Where Your Tone Lives
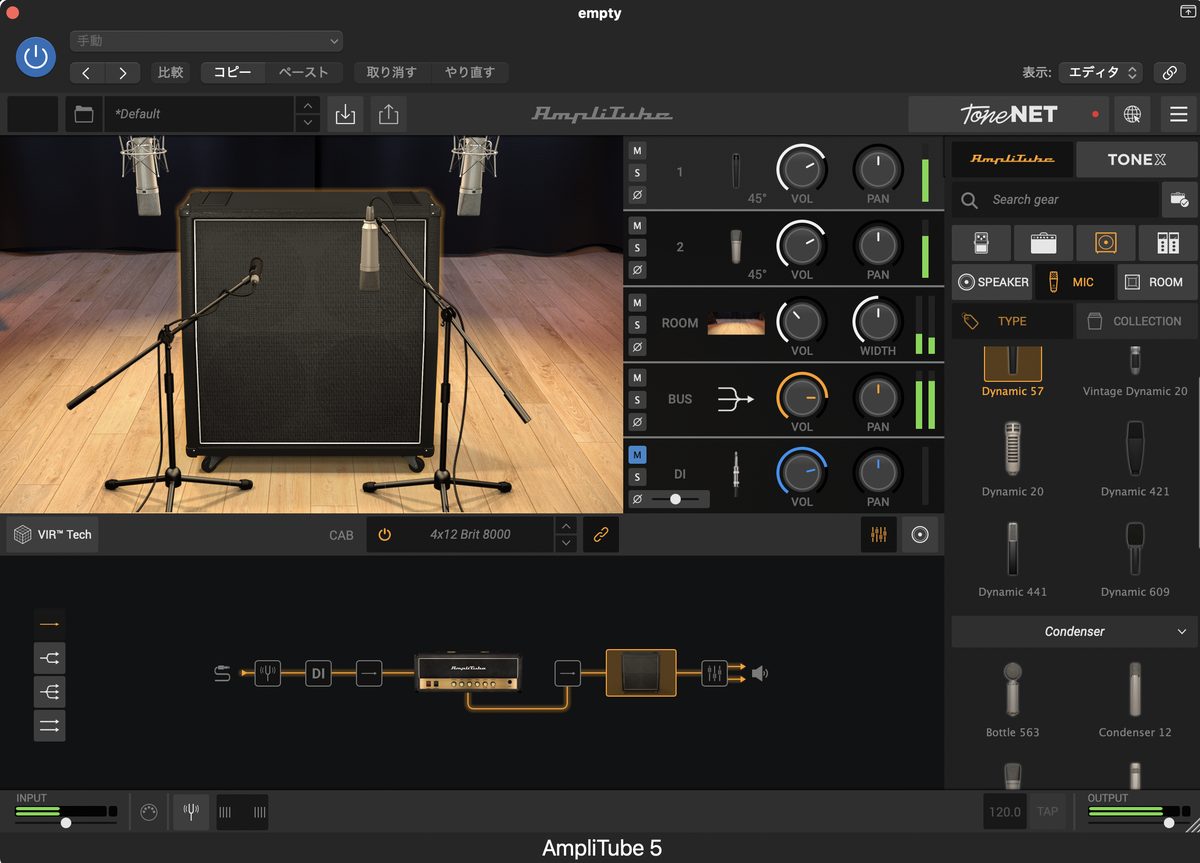
The cabinet section has the biggest impact on your sound in AmpliTube 5.
It uses VIR™ (Volumetric Impulse Response) technology, with 600 IRs captured per speaker.
Choose a Mic Type
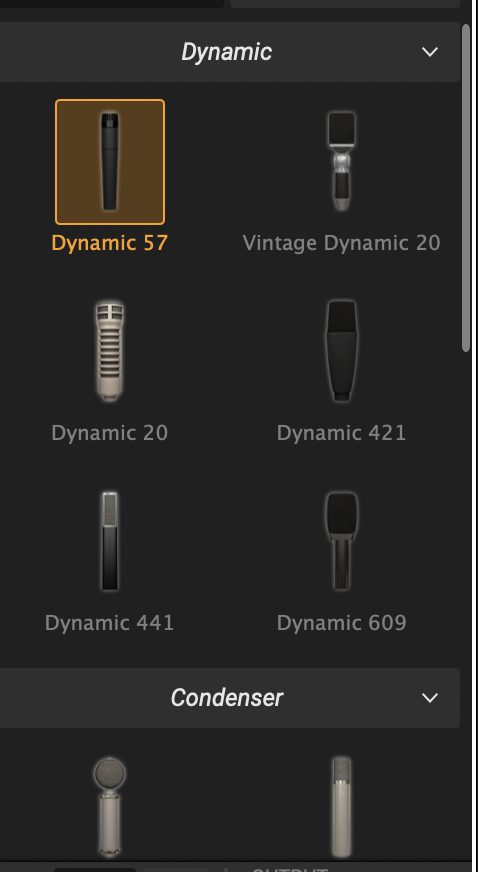
Pick a mic from the "MIC" tab in the right panel. There are dynamic and condenser types.
| Mic type | Tone character | Best for |
|---|---|---|
| Dynamic 57 (SM57-style) | Strong mids, upfront presence | The standard for rock and driven tones |
| Dynamic 20 (RE20-style) | Rich lows, flat response | Clean and jazz tones |
| Condenser types | Delicate, detailed highs | Clean and ambient tones |
Set the Mic Position
In the cabinet view, drag the mic to change its position.
- Closer to the center of the speaker cone = brighter, sharper sound
- Closer to the edge = softer, rounder sound
- Distance matters too: closer = more presence, farther = more air
Add Air with Room Mics
The cabinet section also has room mic settings.
Choose a space like "Subway," "Studio," or "Bathroom" to add the ambience of distant mics.
How to Use Stomps (Pedal Effects)
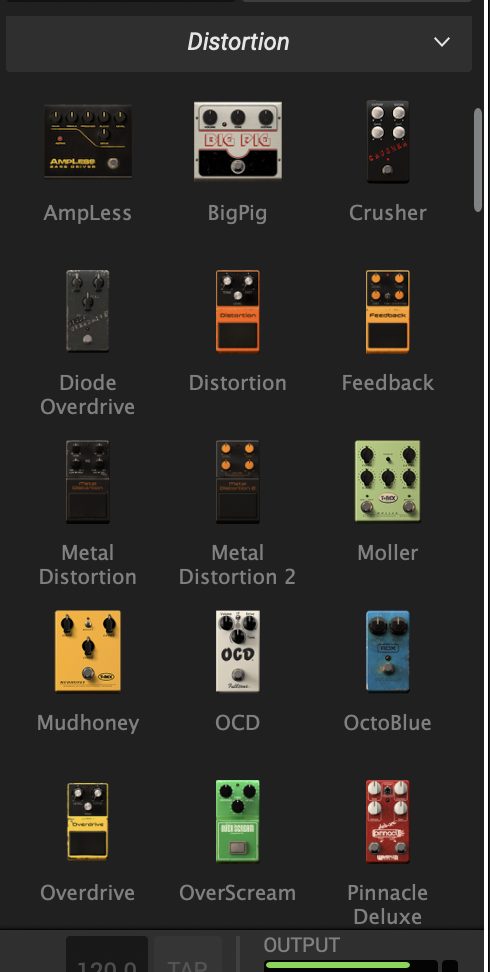
The Stomp section works just like a real pedalboard.
Add and Reorder Stomps
Click an empty slot to open the pedal list. Drag pedals to change their order.
Useful Stomps for Shoegaze and Alternative Tones
| Role | Pedal examples in AmpliTube 5 |
|---|---|
| Boost / extra drive | OCD, OverScream, Moller |
| Chorus | Various chorus pedals |
| Delay | Tape echo types (EchoMan, EP Tape Echo) |
| Reverb | Spring reverb, hall reverb |
How to Use the Rack Section: Post-Amp Processing
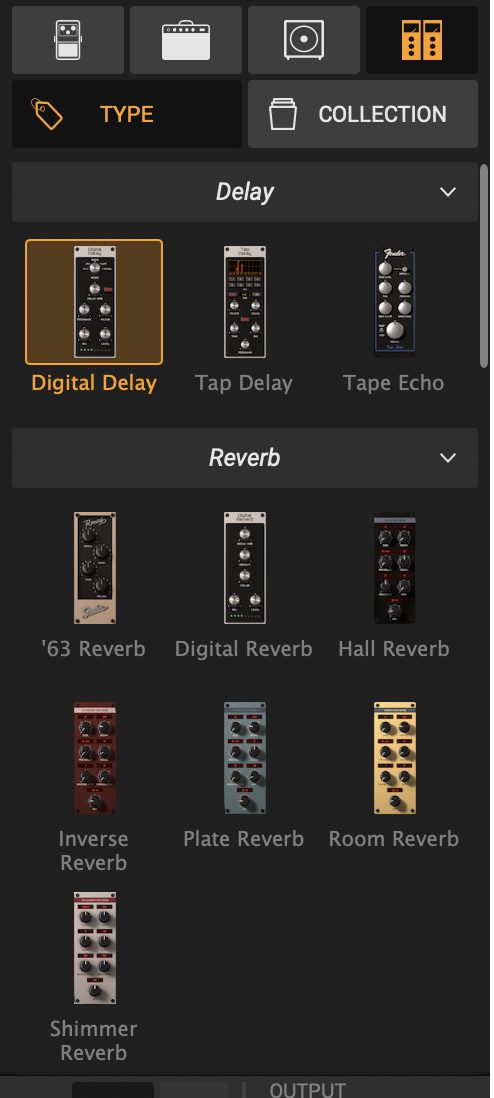
The Rack section holds effects placed after the cabinet.
You get studio-quality processors derived from T-RackS 5: EQ, compression, reverb, chorus, and more.
AmpliTube 5 lets you run up to 57 models at once. Just remember that more models means more CPU load.
Example: Building an Ambient Guitar Sound in AmpliTube 5
Here's how to build ambient tones with the rack's reverb and delay.
An ambient guitar tone built in under a minute. A good reference for using the rack's ambience effects.
Using Presets: Start from Existing Sounds
If you're new to tone shaping, presets are the best starting point.
Presets are organized by genre and playing style. Find one close to what you want, then adjust from there. It's the shortest route to a usable tone.
Using AmpliTube 5 in Logic Pro
Using it in Logic Pro is simple.
- Create an audio track in Logic
- Set the track input to your interface's input channel
- Choose "AmpliTube 5" in the insert slot (Audio Units > IK Multimedia)
- The AmpliTube 5 window opens — set up your amp and effects
- Record
Quit the standalone app when using your DAW
Running the standalone app and the DAW plugin at the same time can cause audio device conflicts. Use one or the other.
About Direct Monitoring
When recording in Logic, latency can become noticeable.
Related article here.
Connecting a MIDI Controller
Want to use a footswitch for live playing or practice? Connect a MIDI controller.
Switching Presets (Program Change)
MIDI Program Change (PC) messages switch AmpliTube 5 presets.
Watch out: preset number offset
Some controllers count PC numbers starting from 0. To call up preset 1, you may need to send "0." Test it to confirm how your controller behaves.
Toggling Effects (Control Change)
MIDI Control Change (CC) lets a footswitch toggle specific effects on and off.
- Right-click the button of the effect you want to toggle
- Select "MIDI Learn"
- Press the footswitch on your controller
- The MIDI assignment completes automatically
Standalone Mode: Practice, Loops, and Live
The standalone version of AmpliTube 5 has three dedicated modes.
| Mode | What it's for |
|---|---|
| Recorder | An 8-track multitrack recorder. Great for capturing ideas fast |
| Looper | Loop-based playing. Handy for practice and improvisation |
| Live Mode | A large stage-friendly UI focused on preset switching |
Hear AmpliTube 5 in Action
Want to hear the actual sound first? Watch this.
An ambient guitar tone built in AmpliTube 5 in under 60 seconds. Good reference for combining the rack's reverb and delay with cabinet settings.
Read the Full AmpliTube 5 Review Too
Now that you know how it works, curious about the sound and how it holds up for home recording?
Summary: Start with Just an Amp and a Cab
AmpliTube 5 how-to: key points
- Connect your guitar to the Hi-Z input on an audio interface
- Set the input device and buffer size in Audio/MIDI Setup
- Signal flow runs stomps → amp → cab → rack
- VIR™ cabinet mic position is the heart of your tone
- Start from presets and adjust gradually
- Don't run the standalone app and the DAW plugin at the same time
- Use MIDI Learn to assign effect on/off to a footswitch
AmpliTube 5 MAX v2 is currently on sale: ¥52,290 → ¥17,812 (65% off, through July 31).
Check AmpliTube 5 MAX v2 at Plugin Boutique
Limited-Time Coupon Deal: Total Studio 5 MAX
¥104,580 → ¥25,493 with the coupon, through July 31 only. It costs a bit more than AmpliTube 5 MAX alone, but you also get TONEX MAX and many other plugins. Full sale details and included plugins are covered in the article below.
Check Total Studio 5 MAX (Limited Time)